The See-Saw Bow Hand
The bowing hand acts like a little see-saw: the thumb acts as a balance point under the stick and the fingers sit on top of the stick, stabilizing the bow. Leaning onto the 1st finger transfers arm weight down onto the string, and leaning onto the 4th (little) finger lifts the bow away from the string. By making subtle changes to the balance of this ‘see-saw’ violinists can achieve an amazing range of different sounds. These exercises will help you get used to the feeling of a relaxed ‘see-saw’ bow hand.
Exercise 1: See-saw exercise at the balance point
Holding the bow at the balance point, move it into a horizontal position by lifting your elbow up and away from your body (fig. x), moving the whole arm as a unit. Take care not to lift your shoulder up towards your ears as you do this.
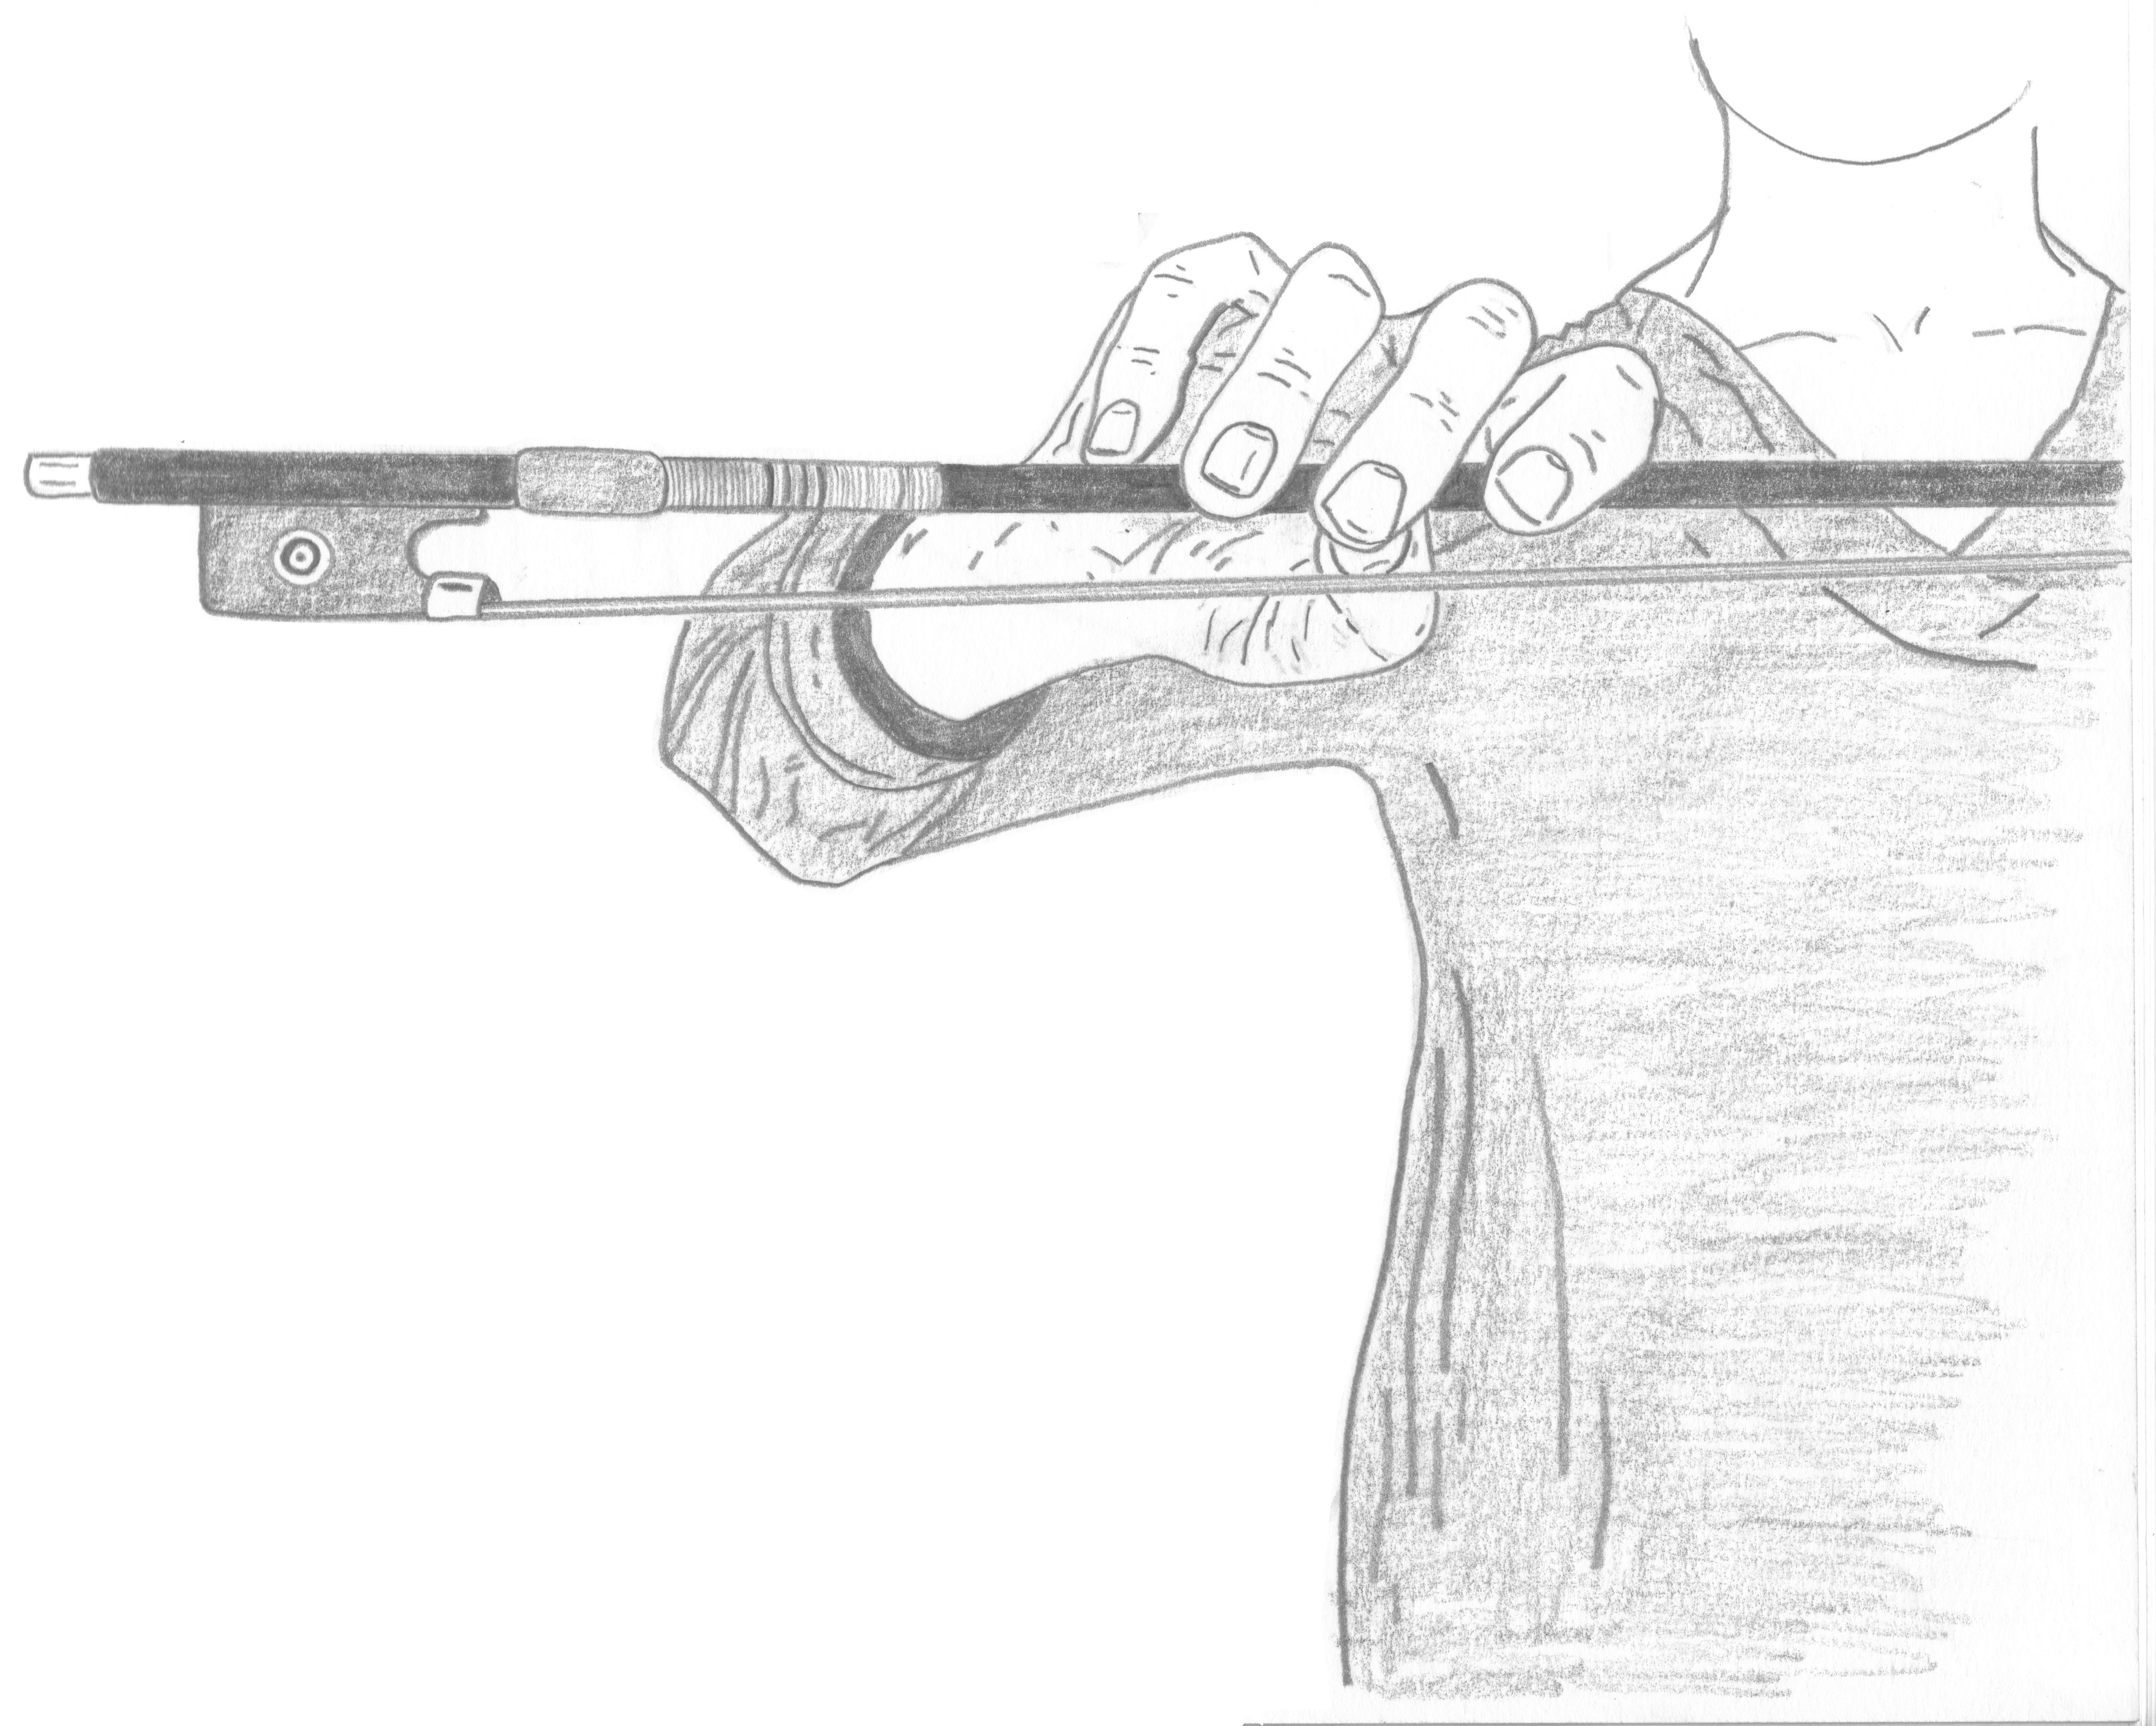
Now use your fingers to gently rock the bow like a little see-saw, so that the tip and frog move up and down. Notice that you alternately use the 1st and 4th fingers to make this movement. Keep your hand relaxed and your finger and thumb joints curved.

See saw bow hand
[insert video]
Exercise 2: Flexible wrist
Still holding the bow at the balance point, move your wrist up and down, from side to side and around in circles. Keep your hand relaxed and your fingers curved as you do this.
[insert video]
Exercise 3. Lifting and lowering the bow
Hold the bow at the heel and move it into a horizontal position by lifting your elbow up and away from your body, moving the whole arm as a unit, and rest the bow hair down on your left arm.
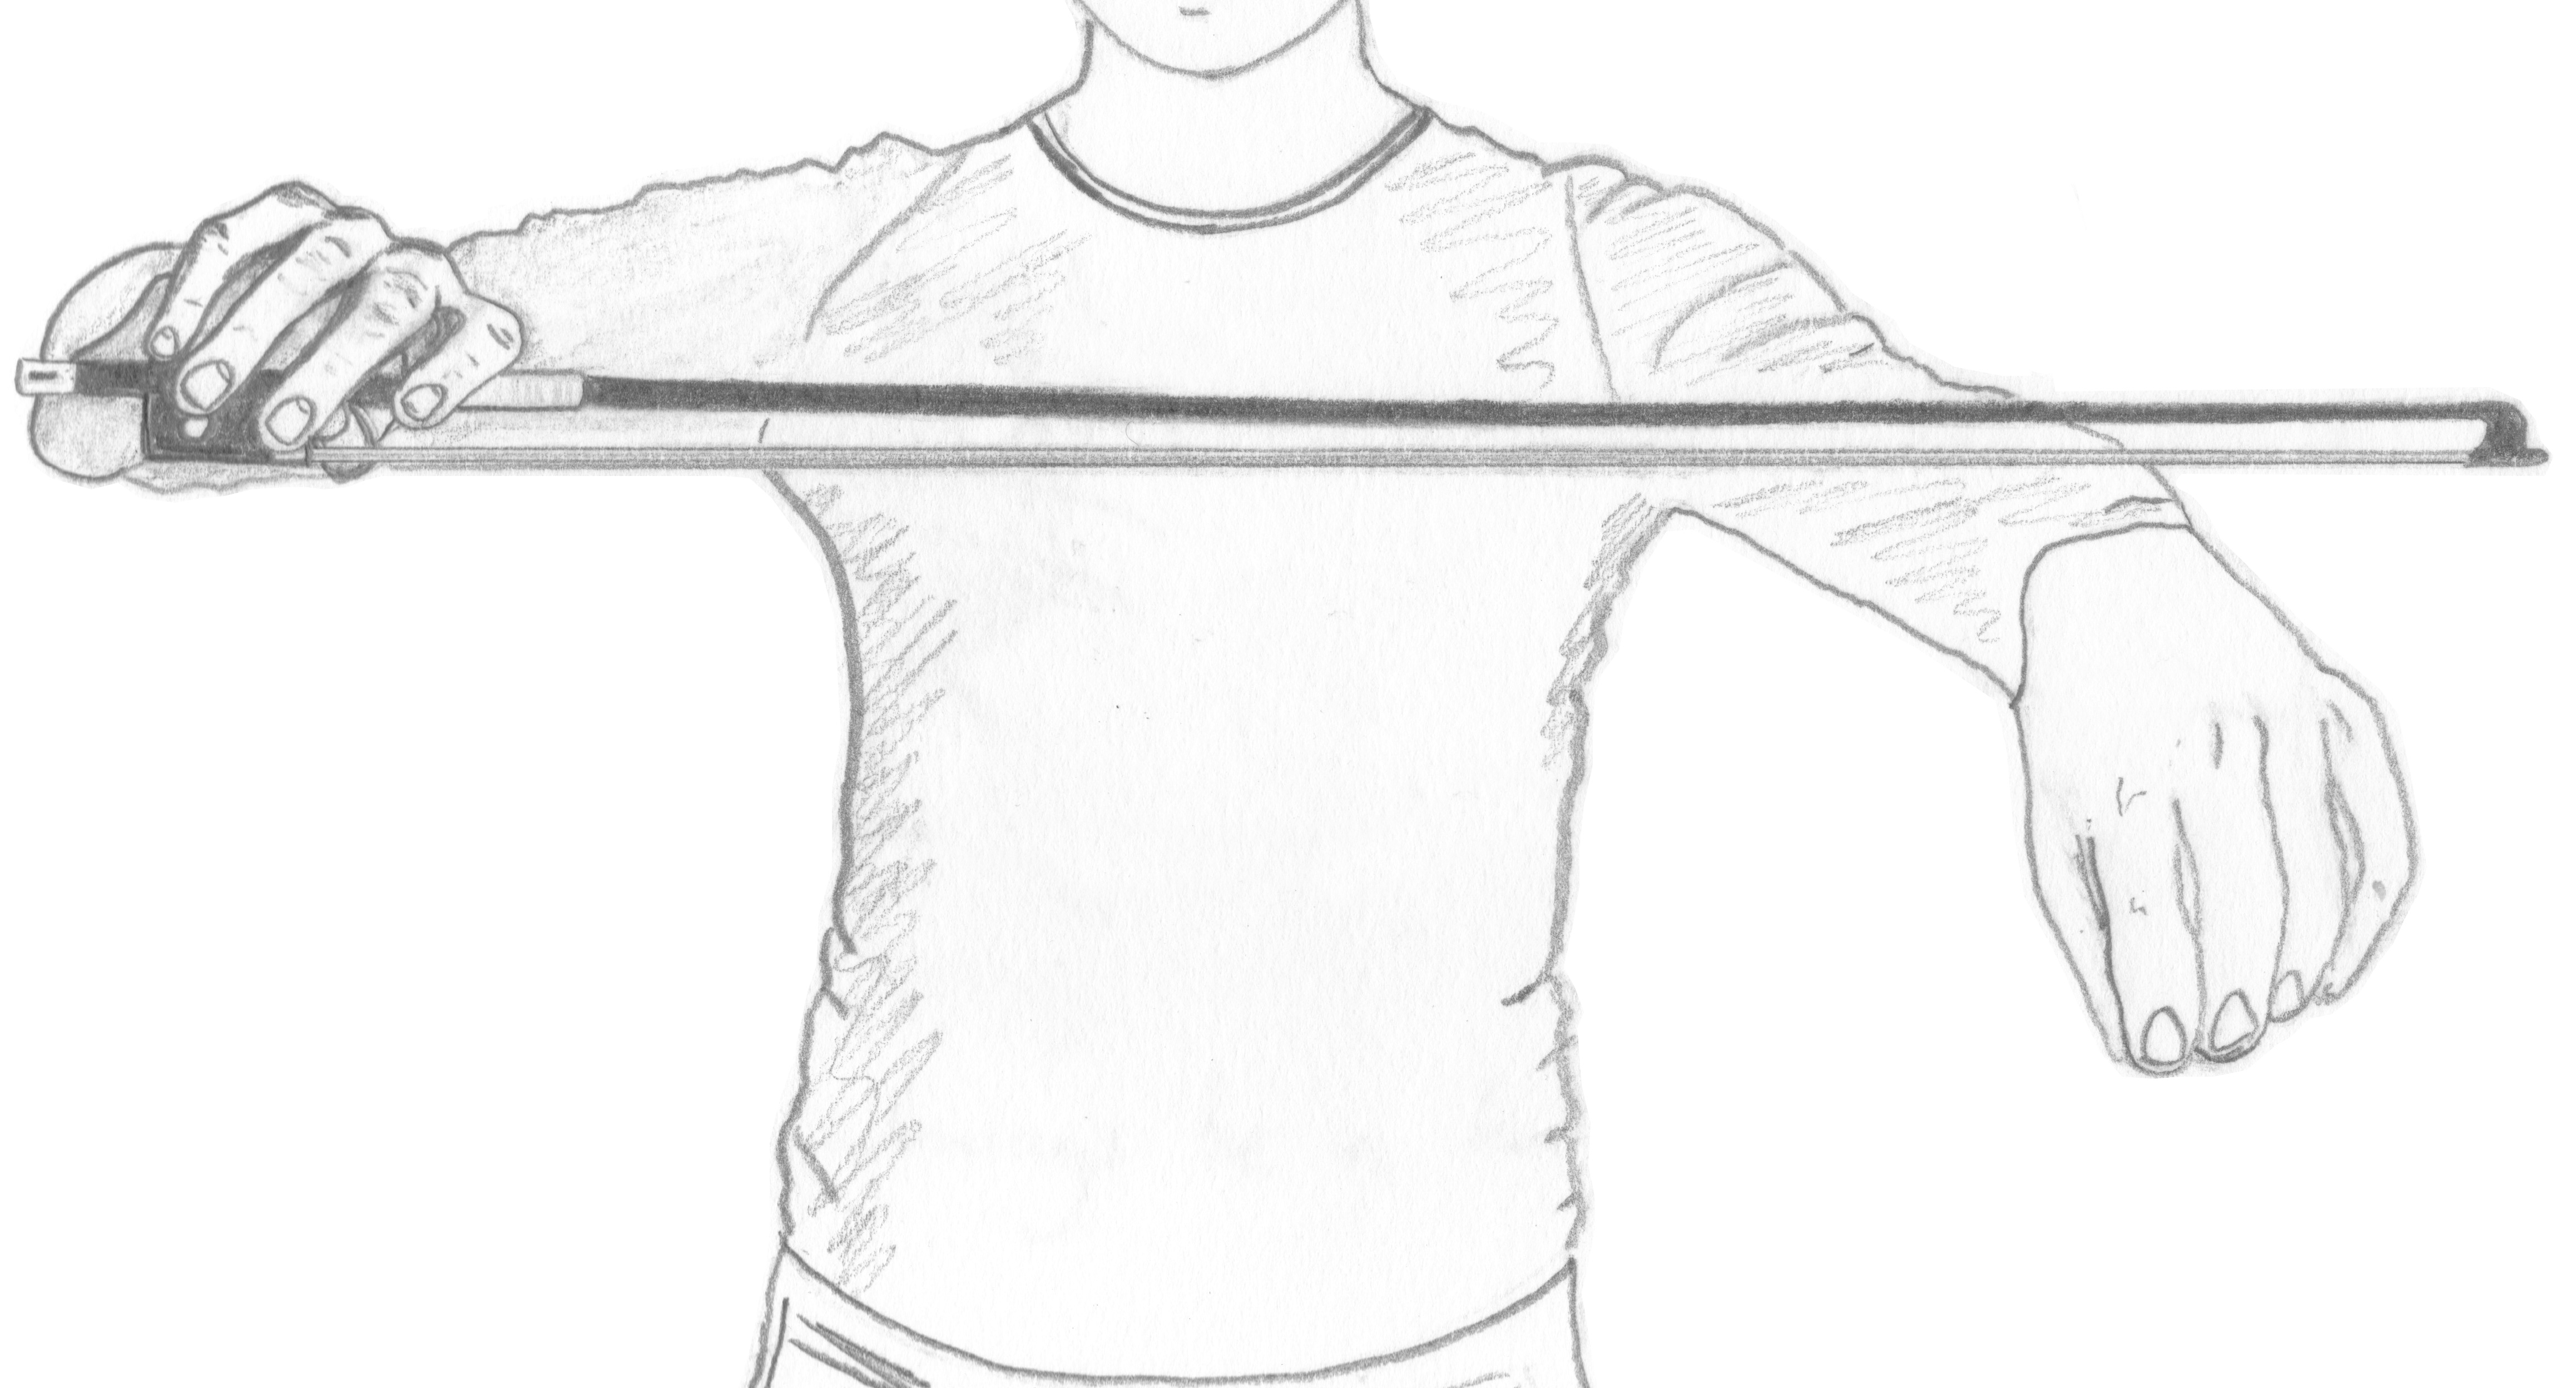
Now, lift the bow about an inch above your arm, then lower it back down and gently press down onto your arm until the hair touches the middle of the stick. Repeat this a few times. Which fingers do you use for each movement? Keep your hand relaxed and fingers curved as you do this exercise, paying particular attention to your little finger when the bow is not resting on your arm.
[insert video]