Click here to go back to the Toubleshooting page
Aches and pains are quite common problems when learning the violin, and are usually caused by tension. It can sometimes be difficult to work out where the tension is originating from, so try checking for the following common problems:
General posture (see Violinworks page 9):
- Are you twisting your body round to the left from the waist? If so, straighten out so that your upper body is facing the same direction as your feet.
- Try making big, swaying movements with your hips, from left to right and around in circles to free up your lower back.
- Bob up and down a few times to make sure you haven’t locked your knees.
- Take a few deep breaths from your abdomen, and feel your shoulder blades sliding down your back as you breathe out.
- Are the muscles in your feet are relaxed? This will help you relax everything else!
Left side:
- Are you leaning your head over to the left or turning it round to the left? Ideally, to prevent neck strain, your neck should be as straight and relaxed as possible, with your head and body facing the same direction as your feet (see Violinworks book 1, page 9).
- Is your neck bending forwards/down? If so, adjust your shoulder rest and/or violin position so that your neck is straight (see Violinworks book 1, page 9-10).
- Are you gritting your teeth or pressing down on the chin rest with your jaw? Open and close your mouth a few times to relax your jaw. (see Violinworks book 1, page 9).
- Are you lifting up your left shoulder? If so, check your violin position, drop your left arm down by your side, allow your shoulder to relax, then lift your hand back up to the violin. You should be able to do this without the violin slipping (see Violinworks book 1, page 11).
- Are you squeezing the violin neck between your thumb and 1st finger? If so, release the pressure on your thumb (see Violinworks book 1, page 12).
- Is your left wrist in line with your forearm and hand? Make sure you’re not pushing it back towards the scroll, twisting it, or squashing it up against the neck (see Violinworks book 1, page 12).
- Wobble your elbow gently from side to side under the violin to make sure your arm is hanging freely (see Violinworks book 1, page 13).
Right side:
- Are you lifting your right shoulder up towards your ear? This is a common problem, particularly when playing up-bows. Try to keep it dropped and relaxed (but do this without changing your elbow level). See the ‘dead-weight’ arm exercise for help with relaxation of your right shoulder muscles.
- Are you lifting your right elbow up so that its level is higher than your bowing hand? This can put strain on your shoulder muscles. Try to keep your right elbow more-or-less level with your bowing hand (see side-on wrist position in the photo below, and the ‘dead-weight’ arm exercise).
- Are you dropping the level of your right elbow so that it is lower than your bowing hand? This can result in a ‘swan neck’ right wrist position (see image below), particularly when playing in the lower half of the bow, causing excessive pressure and tension on the little finger, and pain in the wrist (again, see the ‘dead-weight’ arm exercise).
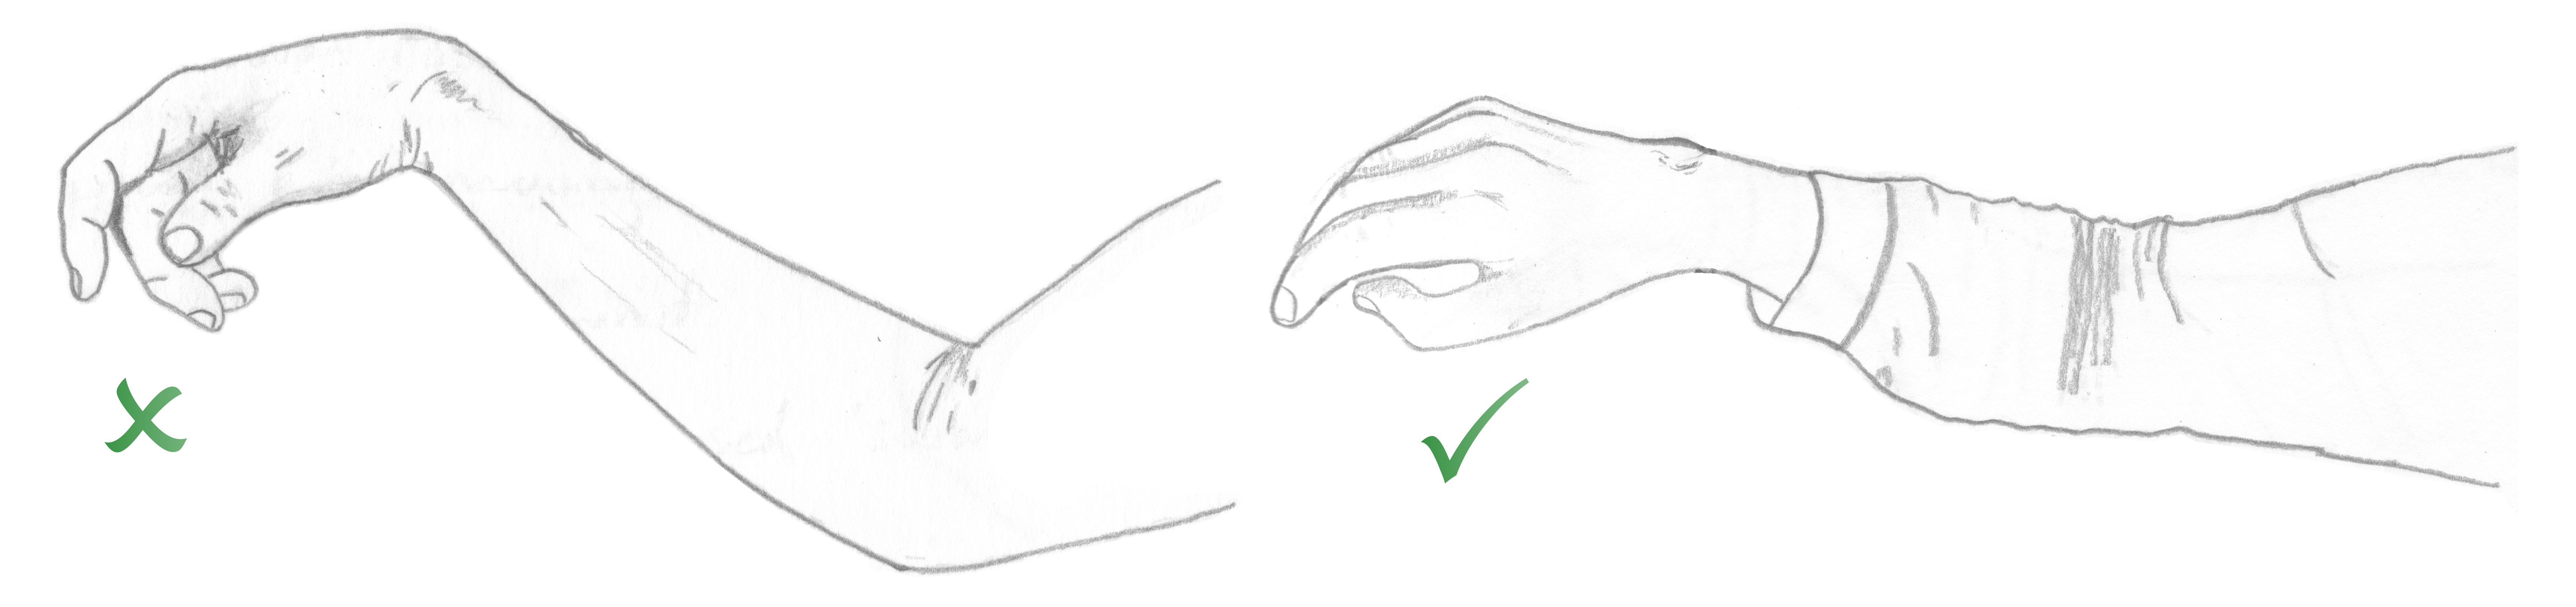
‘swan-neck’ wrist (image on left) / side-on wrist (image on right)
- Are you gripping the bow too tightly? If so, this will lock your wrist and make it difficult to bow freely. Check that the muscle at the base of your thumb is relaxed, that your little finger is curved and relaxed, and that you can move your right wrist freely (see Violinworks book 1, chapter 4).